Beauty...
Be your own
kind of beautiful
Be your own
kind of beautiful


By Melissa Epifano
Getting lush, bouncy beach waves is easier said than done. We’ve all stared in horror after a curling iron left you with cringe-y ringlets or a straightener gave you not-so-cute crimps. Luckily, you don’t need to stress any longer. If you’ve been baffled by the perfect balance of curl and wave that some celebs have achieved with their hair, Molly’s knowledgeable hairstylist Emily Hedicke was kind enough to break it all down.
In a time where you can’t quite run out for a blowout, you’re left to your own devices when it comes to red carpet-worthy hair. Here’s your step-by-step guide to finally nailing the art of the perfect beach wave.
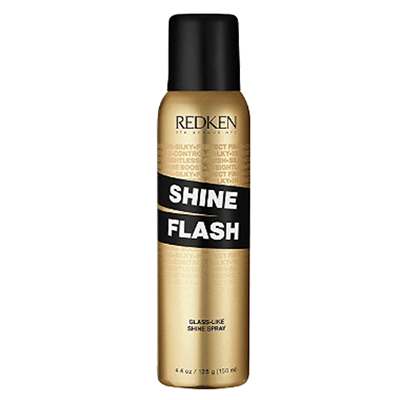
It’s only step one but prepared to be amazed. Hedicke says to not use any prep or styling products before curling. The only thing she says that’s worth spraying through your strands is a shine spray. Why? She explains goopy, tacky products can make the straightener stick and leave you with kinks and imperfect waves — or worse — damaged locks.
Mist Redken’s Shine Flash Shine Spray lightly through your hair and let it set for a minute.
Get your flat iron (or curling iron) warmed up — like the Dyson Corrale or Harry Josh’s ceramic version — and ready to go. Hedicke advised, “What’s really important is that you want to make sure it’s around 375 degrees, not too hot. You want it hot enough to glide but not make creases.”
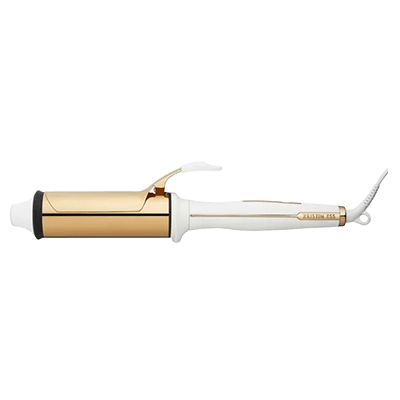
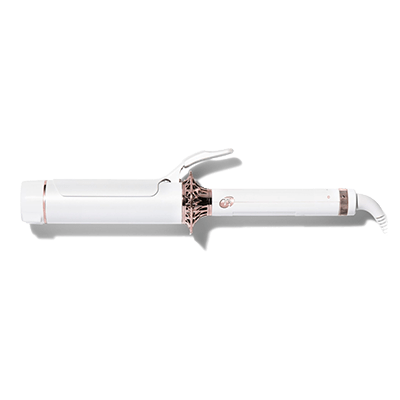
She says if you opt to using a curling iron instead, a two-inch barrel is best, like Kristin Ess’ curling iron or T3’s Bodywaver, which is just under two inches.
While your iron is heating, clip your hair up, leaving the lowermost part of your hair down. Hedicke says to separate it into four sections about 1 to 1 ½ inches thick. Then, take the flat iron starting at the top and twist your hair. Work it down a couple of inches, then release. Use your finger to twirl the curl the rest of the way and let it set. Do this with the other three sections.
Tip: If you get a curl that looks a little too tight or ringlet-like, Hedicke says you can simply go over it with the straightener to loosen it.
You’ll also always want to have your curls go outwards and away from your face. Hedicke provided the perfect tip for making sure this happens: “Always keep your elbow up,” she says. This will keep your form on point and ensure your waves flip toward the back.
Start on the second section of hair, which Hedicke says should hit right around your temples. You should split this new section of hair into three different parts and begin the twist and twirl process with each set of strands.
Now, do the last top layer of hair, repeating the same process you did for the first two sections.
Hedicke says if you have bangs to do them at the very end. Since they’re a whole different length. She says when it comes to waving them, barely pull your flat iron through them and leave them a bit straighter than the rest of your hair.
You’re almost there (just take a sec to admire those stunning waves of yours). Now it’s time to lock all that hard work in. “Leave your hair for a minute or two until everything feels cool,” says Hedicke. “While it’s setting take some texture spray and spray it all around your head. Once you feel completely cool, put your chin up and run your fingers through it.” She explains this helps loosen and tousle the waves and give them more volume when they fall back to the front.
If there are any smaller strands around the top of your crown and near your face that look a little limp, they can be curled once more to give extra texture.
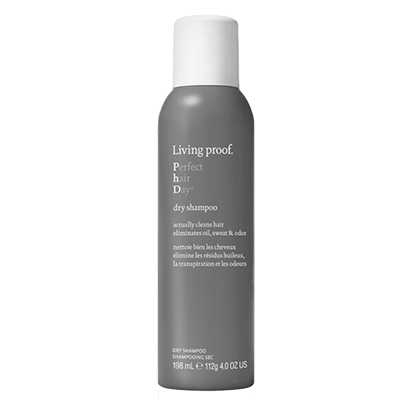
Hedicke left us with a few parting words of advice. “When I finish, I like to put dry shampoo on the scalp because it’ll give you some volume. I also like to add a little extra Shine Spray to the ends to look finished but not over finished,” she says.
She also explains that if you decide to go for a curling iron, it’s important to run over your ends with a flat iron to ensure you get those loose, relaxed waves even if you opt-out of using a flat iron for the rest of the look. Happy styling!
Get your Sephora cart ready because class is in session.
READ MORE >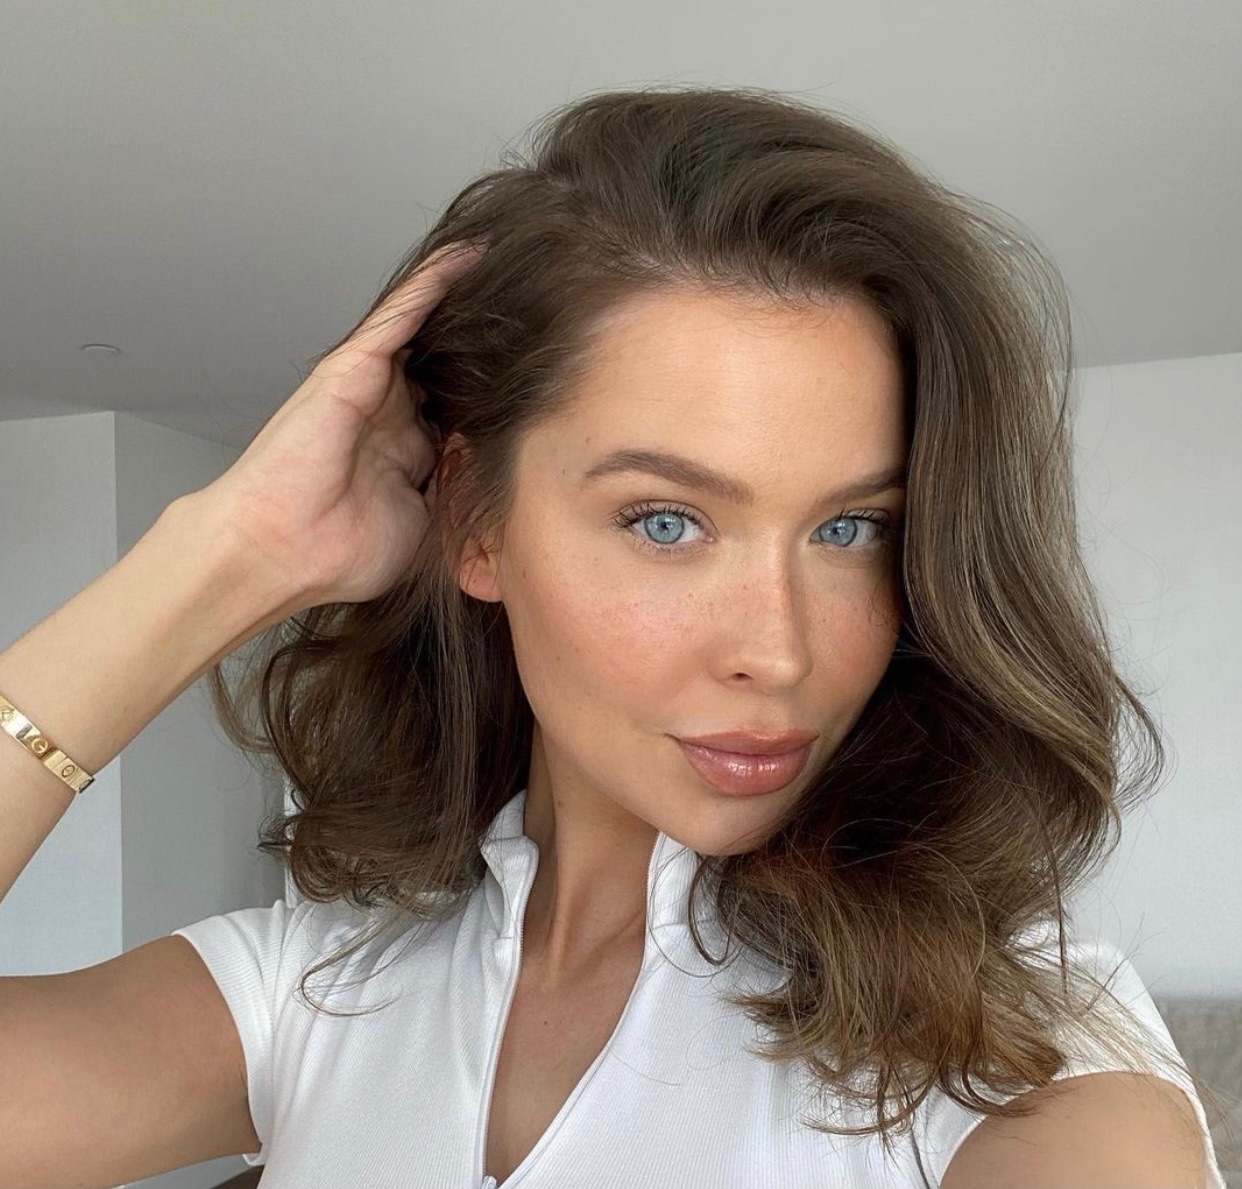
Consider this a parting gift to your overgrown roots.
READ MORE >
Want flawlessly tousled waves? The secret is all in the tools.
READ MORE >
Your hairstylist called and they say it's time to chop it all off.
READ MORE >