Beauty...
Be your own
kind of beautiful
Be your own
kind of beautiful
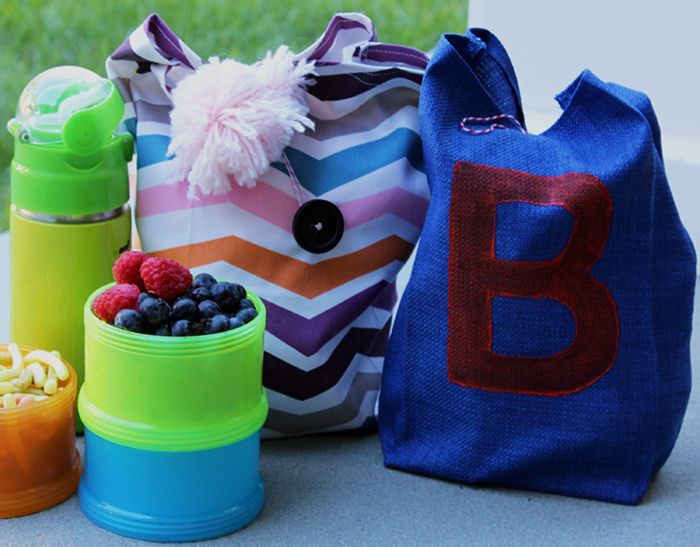


Besides the metal lunch boxes of our past (who had one!?), most of us took our lunches to school in brown paper sacks. Yes, it’s convenient and easy (especially for messes!) but a paper sack isn’t the most eco-friendly.
To get the same look and shape, all it takes is a little canvas fabric and some basic sewing skills. Since it’s durable, a little mess won’t hurt. Either throw in the wash or wipe down with a wet washcloth. It’s also fun to be able to let your kids customize their own!
For Brooks, we chose a bright blue canvas with some simple primary accents. Though not technically going off to school, I couldn’t resist making one for Scarlett. For her, I decided to go with a modern chevron pattern that of course had some pink and added a giant pink pom-pom to finish!

See below for steps to get an eco-friendly and unique lunch sack for the back-to-school season:

Directions:
STEP 1: Fold your fabric right side’s together and cut out 2 rectangles measuring 9 1⁄2 x 13 inches

STEP 2: Pin and sew, either with machine or by hand, the sides and bottom together (right sides together!) 5/8th inch from the edge making sure to secure the start and finish by double stitching
STEP 3: Fold the edge of top open end over 1⁄4 inch and iron. Stich to secure
STEP 4: Pull on the other sides (unsewn sides) to open and press flat so that the sewn edges are in the middle of the rectangle. Iron flat your seams
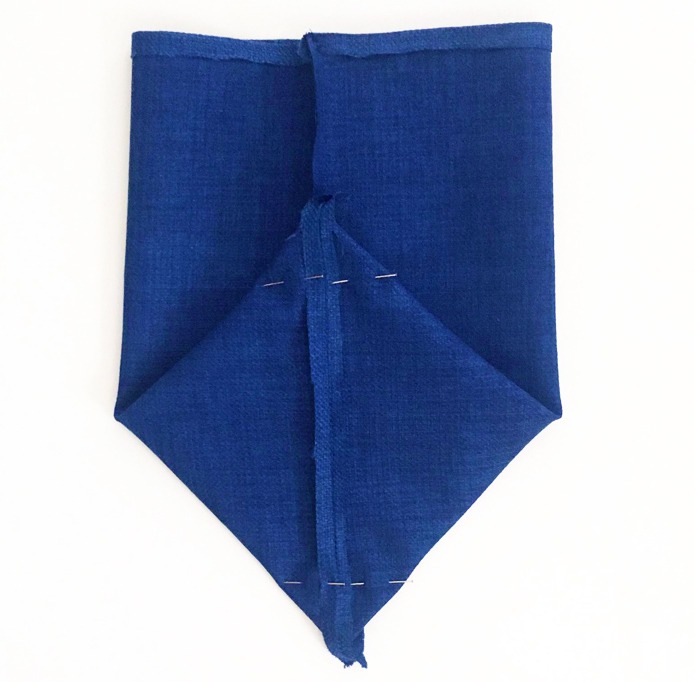
STEP 5: Fold the bottom to make a diamond shape and iron flat. It happens fairly naturally though you may have to coax a little
STEP 6: Measure 1 1⁄4 inch from the top of the diamond and mark a straight line
STEP 7: Cut this line, don’t worry, trust me, I know it is a little scary but we will fix it. Now do the same to the other tip of the diamond
STEP 8: Sew a straight strait line 5/8th inch from side to side both edges
STEP 9: Turn your lunch sack right sides out and iron flat folding the bottom up to create a rectangle like the bottom of a paper lunch sack
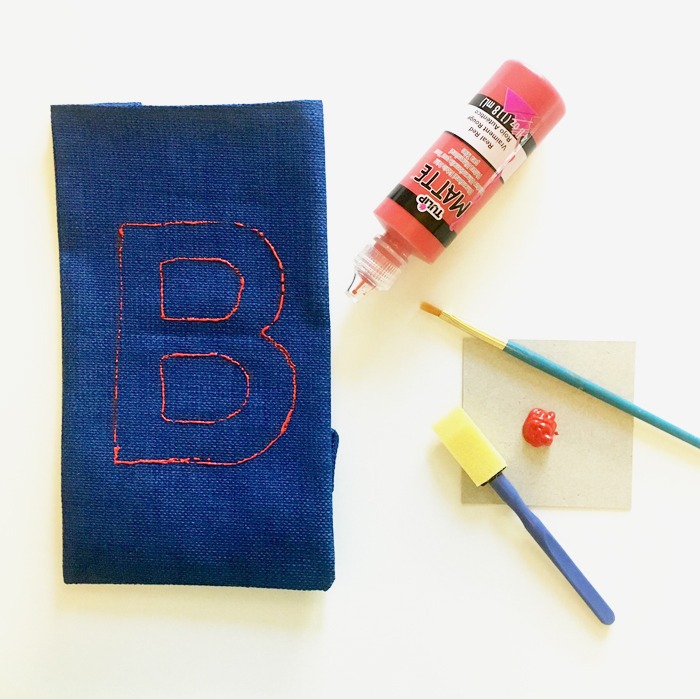
STEP 10: To make it more personal, I traced a stencil of a B on one side and painted it red with fabric paint
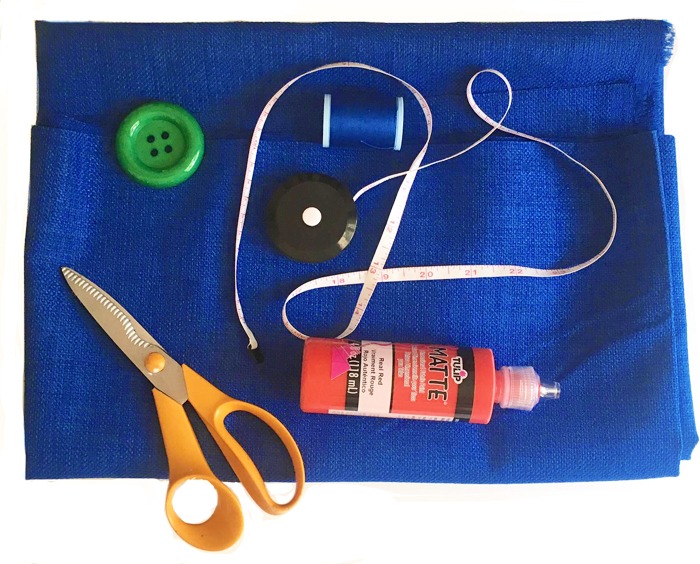
STEP 11: Fold the bag over for closure. To make it more secure and honestly cuter, I added some red & white striped string and a giant green button
STEP 12: For Scarlett’s, I used pink & white string and a cute contrasting black button. Since the fabric is patterned, kept is simple but still needed some flair, I added a giant pink pom-pom
For other eco-friendly DIYs for kids, check out these links:
Popsugar | Eco Friendly Crafts For Kids // Better Homes & Gardens | Clever Recycled Crafts For Kids

