Beauty...
Be your own
kind of beautiful
Be your own
kind of beautiful


Dry hand season is in full effect right now. Between the cold weather and washing your hands a million times a day to avoid the latest cold/flu germs your skin is enduring some harsh treatment. Fear not friends, I have the perfect DIY solution for you!!
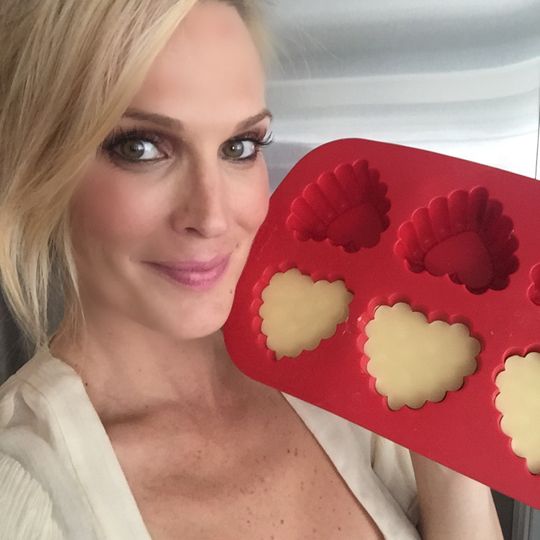
Lotion bars are a chic and cool concept. Think of them like a bar of soap, but they are depositing moisturizing lotion on your parched skin. No harsh chemicals just natural goodness. Your green goddess friends would definitely approve. Lotion bars are the perfect handmade gift. Even better, these little buddies are super travel friendly. No more stressing about liquids in your carry-on suitcase because your lotion just became a solid. If it’s your lips that are needing a little TLC, then you should check out my lip scrub recipe.
The essential oil element is something that you can completely tailor to your needs or if you are giving them as a gift, then suited to your recipient. I like to add more than one type of essential oil to my bars. I do not recommend using more than three scents at a time. For these bars I chose to use lavender, orange and bergamot oils for my scent. Also you can add items like zinc oxide if you are making a bar for a baby with diaper rash. Fermented cod liver oil is also a good additive for those with Eczema.

The picture below shows aerial view of everything almost melted… patience is a virtue with this project!!

Now that we have your parched skin soothed what about your nails??? I’ve got a treat for you my lovely readers… a GIVEAWAY from Essie Nailpolish. If you sign up for my newsletter here… I will choose 3 new subscribers to receive a gift from Essie! (Entries must be from the United States.)