Beauty...
Be your own
kind of beautiful
Be your own
kind of beautiful


Happy (almost!) first day of May! Since I’m from the South, we are all about tradition. Every spring, in elementary school, we always looked forward to making our May Day baskets.
Throughout history, the making of May Day baskets signified the welcoming of warmer weather. To celebrate, people would fill the baskets with candy, gifts, and flowers and drop them off door to door. Unfortunately, this custom isn’t as prevalent as it used to be. And in my opinion, it needs to be brought back!
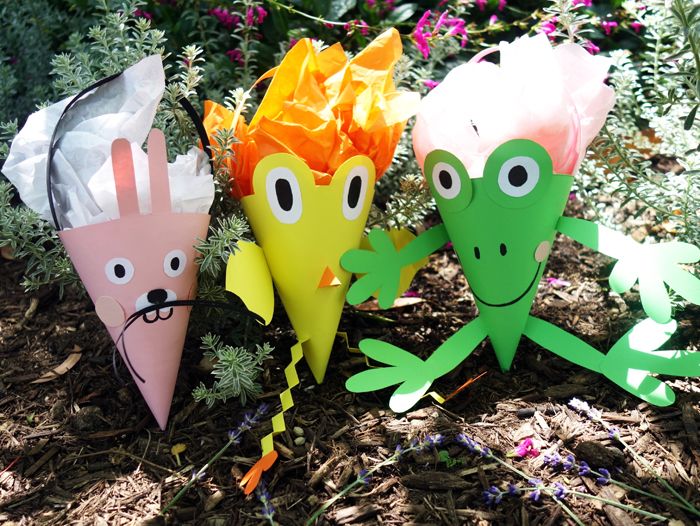
Normally, May Day baskets are designed by weaving strips of construction paper together with a strip glued on top for the handle. This year, I decided to change them up a bit by designing them as cute springtime animals!
Normally, May Day baskets are designed by weaving strips of construction paper together with a strip glued on top for the handle. This year, I decided to change them up a bit by designing them as cute springtime animals!
Once they are constructed, fill with candy or flowers and pass out to friends and family. Back in the day, May Day baskets were given anonymously as a way to brighten someone’s day. Brooks’ and I are making a bunch and dropping them off door to door. We love this springtime tradition!

Here’s the step-by-step + a pattern print-out to get you started:
Materials:

Directions:
The pattern (below) is for the frog May Day Basket and can be easily modified for the two others or to create your own.