Beauty...
Be your own
kind of beautiful
Be your own
kind of beautiful


Happy Thanksgiving! I hope everyone is having an amazing day filled with family, friends, and food. This year I have a lot to be thankful for! We welcomed our beautiful little angel, Scarlett and Brooksie is the best big brother there is. While today is full of thankfulness and food, there’s still always room for a little DIY crafting, right?
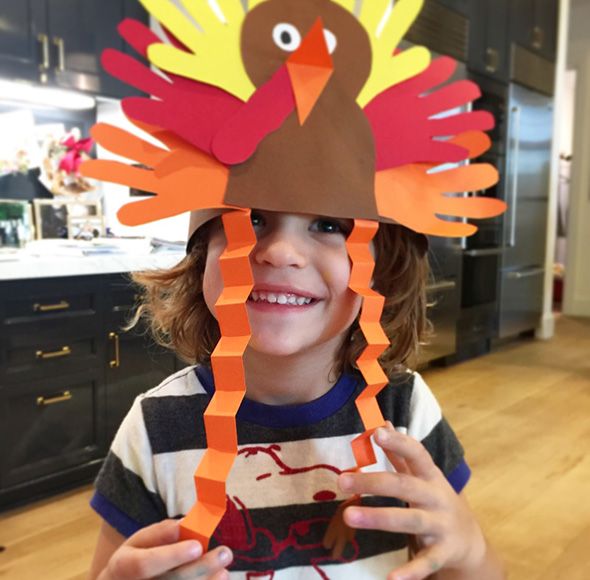
We are having friends and family over this afternoon for the holiday and Brooksie will not stop talking about being a turkey. So, what did this momma do? We made him a literal turkey. You’d think after making him being a lettuce, he’d call it quits.
Here’s the step-by-step on how we made this adorable turkey hat. Make it a pre-dinner kids table activity to entertain the little ones! You’ll thank me.

Supplies Needed:
Directions: